Git and GitHub for Beginners Explained in 5 minutes
Git and GitHub for Beginners (2026) – Simple Guide
A simple and clear guide to Git and GitHub for absolute beginners.
What is Git?
Git is a tool that helps you track changes in your code.
It remembers:
- What changed
- When it changed
- Who changed it
Think of Git like a save button for your code, but much smarter.
What is GitHub?
GitHub is a website where you store your Git projects online.
It lets you:
- Back up your code
- Share code with others
- Work with a team
How to set and configure git and github
Step 1: Install Git
Windows
- Go to https://git-scm.com
- Download Git
- Install using default settings
Mac
brew install git
Linux
sudo apt install git
Check Installation
git --version
- Shows which version of Git is installed.
Step 2: Configure Your Identity
Run these commands in your terminal (VS Code terminal is fine):
git config --global user.name "Your Name"
git config --global user.email "your@email.com"
- user.name: Your name that will show on commits
- user.email: Your email that identifies your commits
Step 3: Create a GitHub Account
- Go to github.com
- Click Sign up
- Verify your email
- GitHub stores your projects online and allows collaboration.
Step 4: Basic Git Commands
You can run these commands from VS Code terminal in your project folder.
Initialize Repository
git init
- Starts tracking your project in Git.
Check Status
git status
- Shows which files have changed and which are staged for commit.
Add Files
git add .
- Stages all files for commit (prepares them to be saved).
git add filename.txt
- Stages a specific file only.
Commit Changes
git commit -m "Add initial files"
- Saves a snapshot of your project with a message explaining changes.
View History
git log
- Shows a list of past commits, who made them, and messages.
Step 5: Connect to GitHub
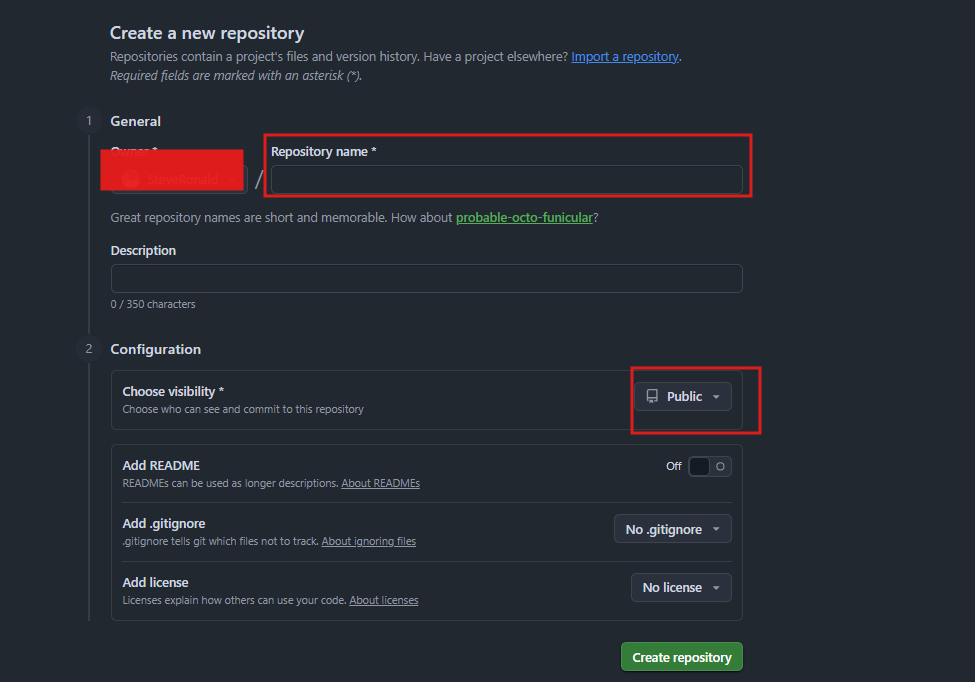
Create Repository on GitHub

-
Click + → New repository on GitHub
-
Enter a repository name
-
Click Create repository
Link Local Project to GitHub
git remote add origin https://github.com/username/repo.git
- Connects your local project to the online repository (replace
usernameandrepowith your GitHub username and repo name).
git branch -M main
- Sets the main branch as default.
git push -u origin main
- Uploads your local files to GitHub for the first time.
Tip: Open VS Code, navigate to your project folder, and run all Git commands from the integrated terminal.
Step 6: Daily Workflow
After making changes, use these commands in VS Code terminal:
git status
- Check what changed
git add .
- Stage all your changes
git commit -m "Describe your change"
- Save changes with a clear message
git push
- Upload your changes to GitHub
Step 7: Pull Changes
git pull
- Fetches the latest changes from GitHub and updates your local project
Step 8: Branching
Create and Switch Branch
git checkout -b feature-name
- Makes a new branch to work on a feature without affecting main
Merge Branch Back
git checkout main
git merge feature-name
- Combines changes from the feature branch into main
Common Commands Cheat Sheet
git init                    # Start tracking project

git clone <url>            # Copy a repository from GitHub

git status                 # Check changed files

git add .                  # Stage all changes

git add filename.txt       # Stage a specific file

git commit -m "message"    # Save changes with a message

git push                   # Upload changes to GitHub

git pull                   # Download changes from GitHub

git branch                 # List branches

git checkout <branch>      # Switch branch

git merge <branch>         # Merge a branch into current branch

git log                    # View commit history
Troubleshooting
- Permission denied → set up SSH keys
- Merge conflict → resolve conflicts manually
- Detached HEAD → switch back to main branch
Best Practices
- Commit often with clear messages
- Pull before pushing to avoid conflicts
- Use branches for new features
- Write descriptive commit messages
- Don’t commit sensitive files (.env, passwords)
If this guide helped you:
- Like this post
- Comment if something clicked
- Share it with someone learning programming
- Follow for more beginner-friendly tech guides
🌐 Visit our website: Codecraft Academy
📱 Join our WhatsApp group: Join Our Whatsapp Group
All commands should be run from VS Code terminal in your project folder.
You now know Git basics and where to link your project to GitHub!
Comments (0)
Leave a Comment
No comments yet. Be the first to comment!